Keyboards are a gateway drug. At least they were for me. It started out innocuously enough: I bought a keyboard kit (Sofle Choc from PandaKB) with all the parts online, then put it together over the course of a week. That was my first big “build.” Part of the project was hand-soldering the optional surface-mount LEDs, the successful installation of which pushed my confidence through the roof. So, when I saw the Лілка (Lilka) project pop up in one of my feeds, I went for it, figuring “how hard could it be?” It turns out, it’s not that bad, but it can still be a major pain in the ass.
What in the world is a Lilka?
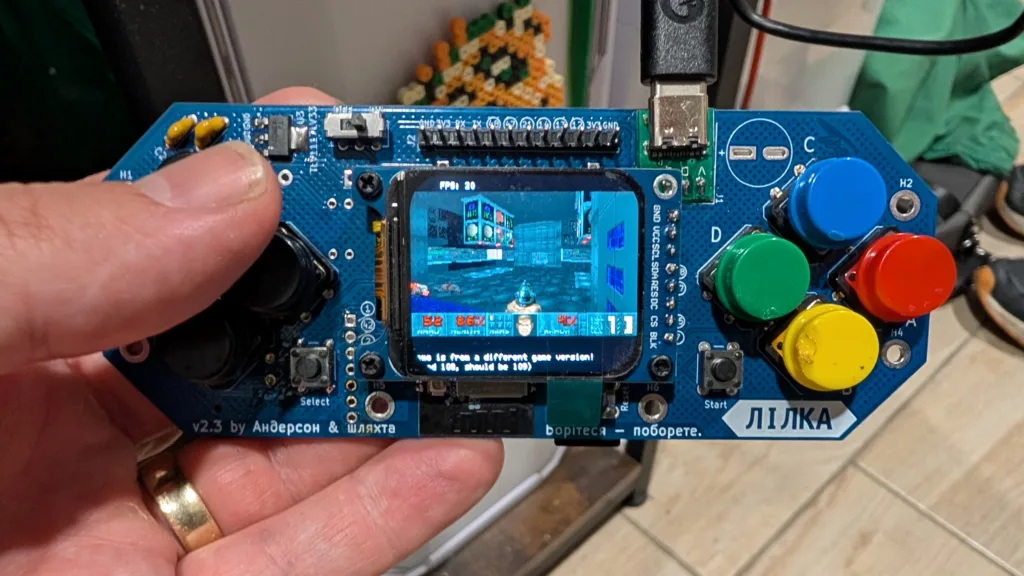
At its most basic, the Lilka is a DIY handheld ESP32-S3 console with a custom-built PCB and bespoke firmware called KeiraOS. It looks like a stripped-down, knock-off SNES controller. You can write programs for it in C++, Lua, or mJS (a subset of JavaScript), or you can run any of the ready-made programs already out there directly off an SD card. And just as with any open-source project, there are tons of different firmwares already out there for you to tinker with.
Sourcing the Lilka
I wouldn’t call myself lazy, but I don’t like to do more work than I need to. In my quest to build a Lilka, I would have preferred to order a kit online and solder all the included bits together. The issue with the Lilka is that it is made in Ukraine, and all the kits have sold out and are only available from Ukrainian vendors. Thankfully, the community behind Lilka has a near-comprehensive bill of materials with AliExpress links to help you get started. Did I mention it’s all in Ukrainian?
Once you successfully make a saving throw to overcome the intimidation of a webpage that’s in a different alphabet, it’s pretty easy to make sense of the BOM using the in-browser translation tools. The most important thing to keep in mind when assembling all the parts you need for this project is the details. Don’t be afraid to shop around on AliExpress for the best prices and shipping, but make sure you’re getting the correct parts, even if that means looking at the .ua links for a better idea of exactly which part you need. Also, don’t be like me — double-check that you’re ordering all the parts, that way you don’t have to wait two extra weeks to put it together because you forgot the voltage regulator.
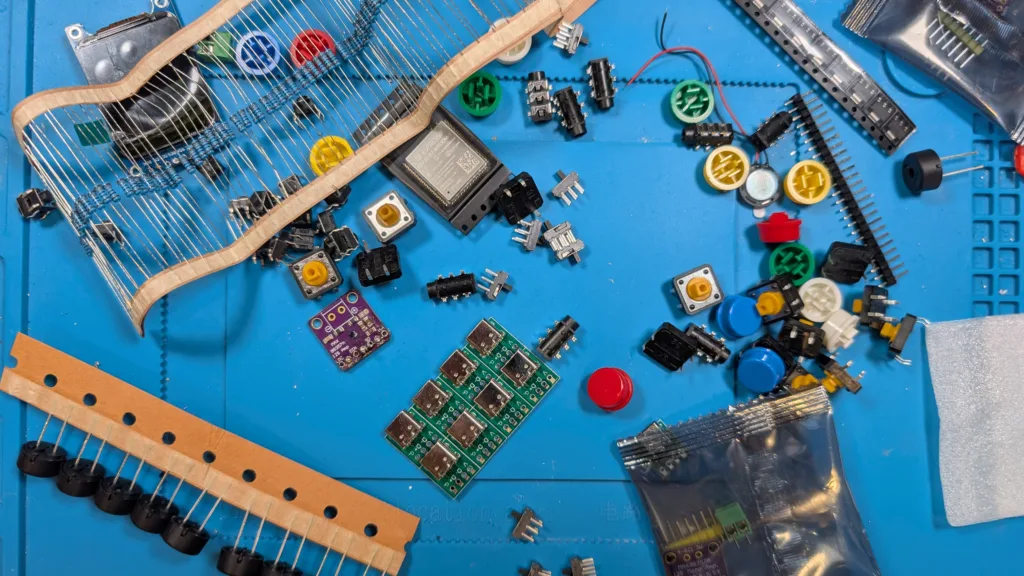
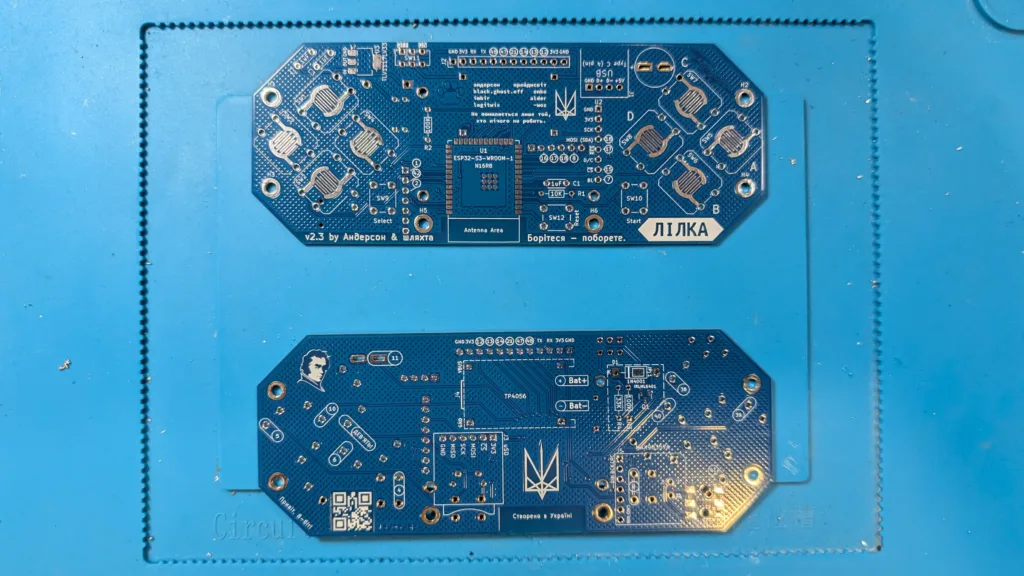
Oh, and you’re going to need to get the PCB custom-printed. The files you need for this aren’t plainly listed on the Lilka site, so you’ll need to get them off of the creator’s GitHub and bundle them up into a .ZIP file for sites like JLPCB or similar. If you’ve never ordered a custom PCB before, don’t stress it; it’s more intimidating than it is difficult. And if you’re building the Lilka, you might want to do it with friends, because only a few of the parts are available to buy individually. Most everything you’ll need to purchase at least five of, including the custom PCBs.
Building the Lilka
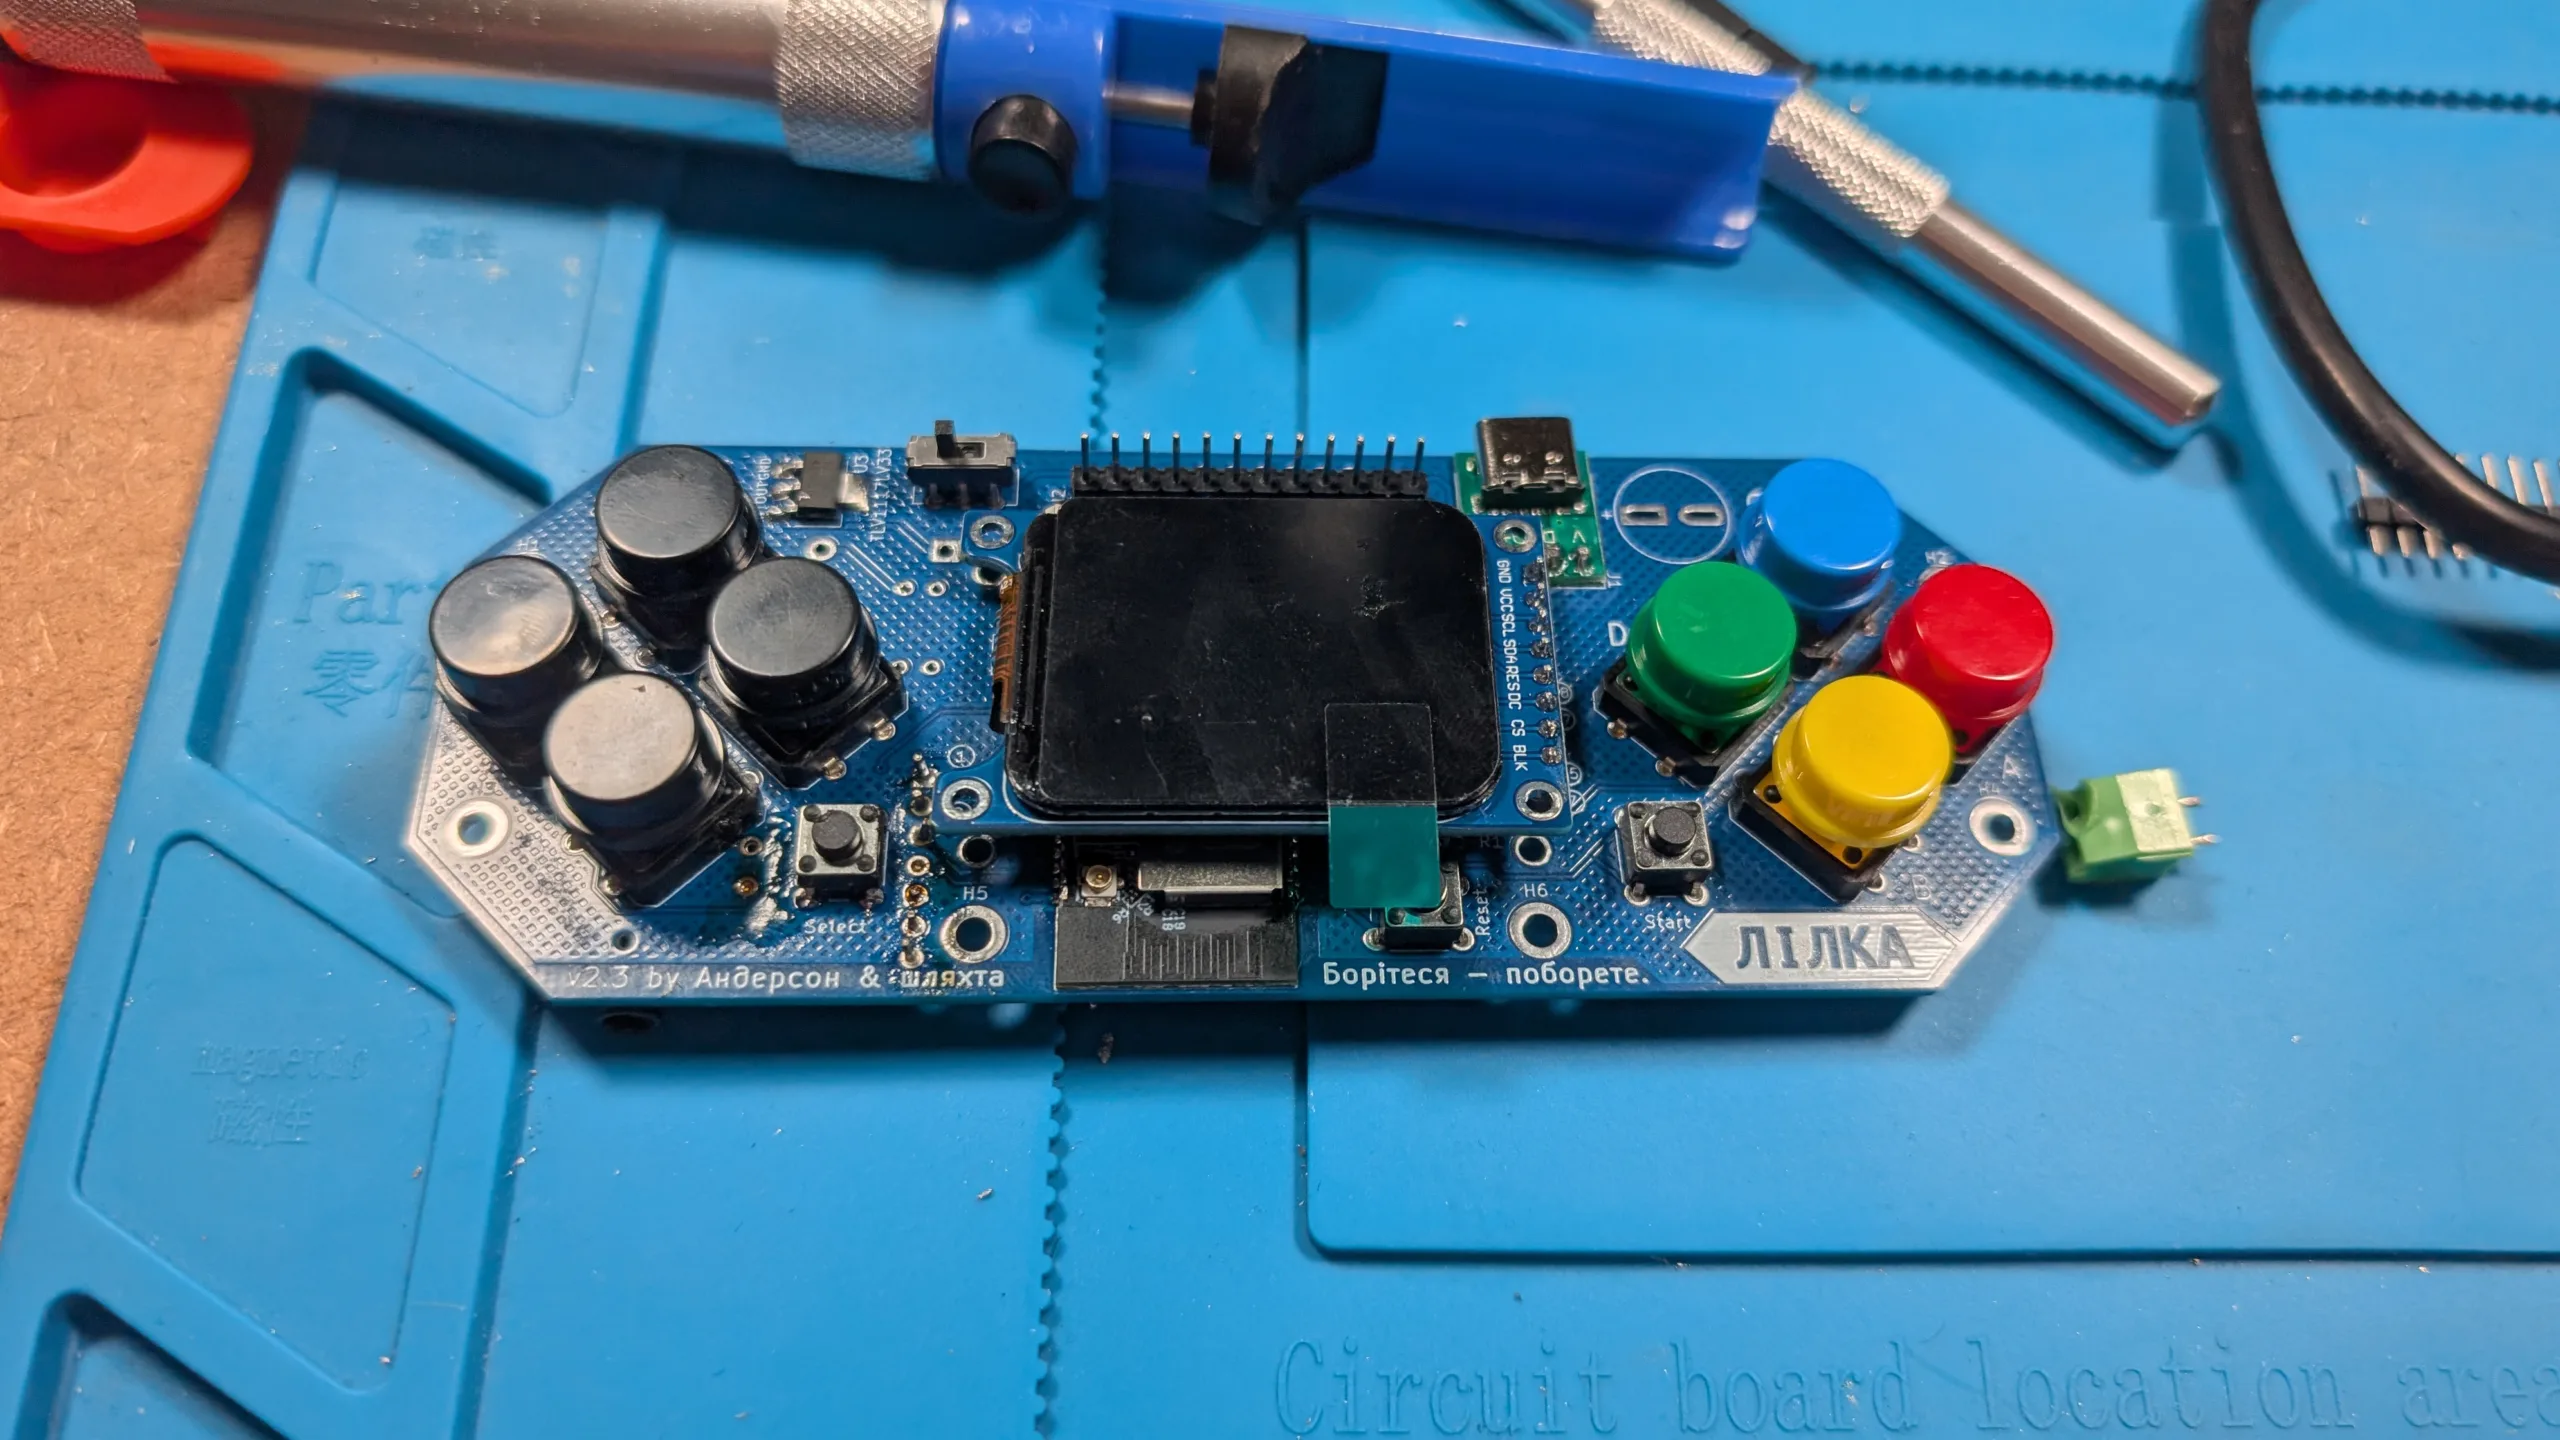
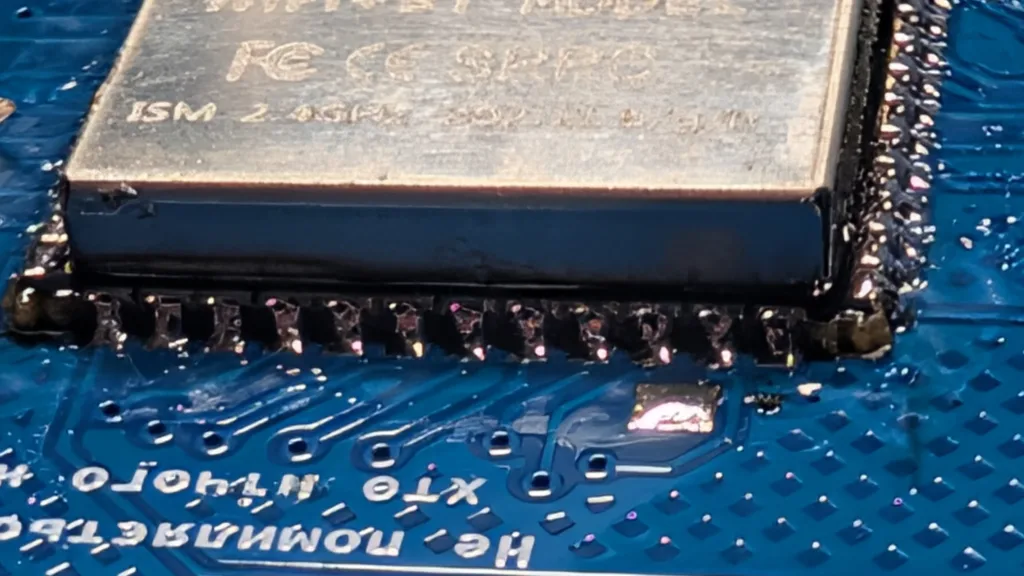
Once all the parts arrive from China, it’s time to put your soldering skills to the test. Most of the soldering is pretty straightforward. Some of the surface-mount components can be fiddly, but not more so than LEDs on a keyboard. Where the Lilka is a big step up from putting together a keyboard, is getting the ESP32 on the board. The width of the contacts are less than a millimeter, and there are 40 of them surrounding the perimeter of the chip. My initial fear was having to use an ultra-fine soldering tip to individually solder each pad, but it turns out you’ll want to use a chisel tip to drag the solder onto those pads. The technique isn’t too hard, and since it was my first time, I went around the ESP32 testing adjacent contacts for any shorts (I only found one, which required a quick reflow).
The next thing you need to be aware of is that when you’re following the build instructions, there are lots of “gotchas” putting this together. For instance, the contacts for the Select button are underneath the sound module, so if you solder the sound before the button, you won’t be able to solder the button properly.
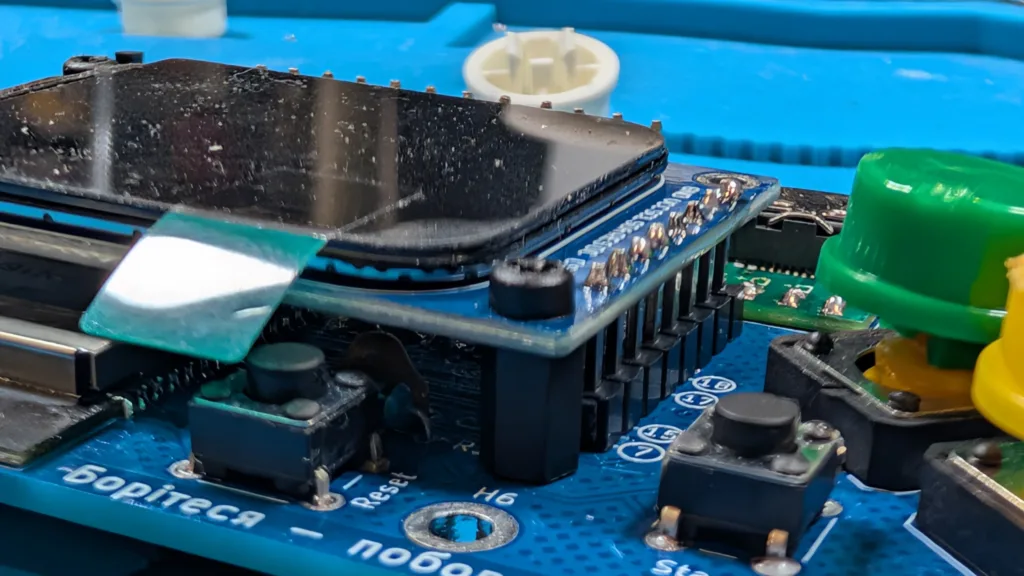
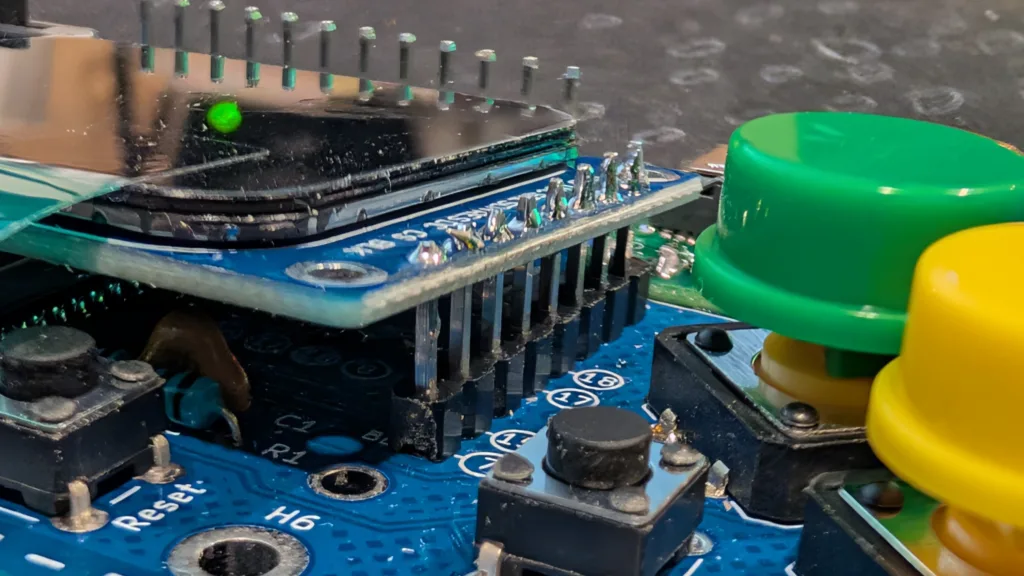
I would also advise you to get some 6 mm M2 stand-offs to support your display. It’s tricky to get it in place and even trickier to get it level. If having wonky-looking components is something that bothers you, you’ll definitely want to make the investment. Keep in mind that you’ll probably only need three stand-offs, despite the LCD display module having pass-throughs on each corner. The PCB offers only three corresponding pass-throughs, and one of those is partially occluded by the SD card module.
Finally, if you want a clean profile on your build, invest in some sprue cutters or similar tools that can cut something flush. There are times when, in order to install a module flush to the board, you’re going to need to not just trim the soldered leads from some components, but you’re going to want to remove all protrusions. This is an exercise in patience and persistence more than skill, but it makes a difference in how nice your build looks. The board I got from JLPCB didn’t have any mousebites and was a solid color throughout, so thankfully, that didn’t need any finishing.
Flashing the Lilka
Once you have your Lilka built, the only way to know if you’ve been successful in all your solders is to power it up and turn it on. Of course, even if you’ve done everything right, you’ll need to flash a firmware on your microcontroller for the Lilka to do anything. This was another big pain point for me because the official instructions involve installing VSCode plug-ins and putting your device into boot mode.
My device did not want to go into boot mode. I don’t know if it was a flaw with my board/installation or a flaw in the instructions, but pressing Select while powering on didn’t engage boot mode on my Lilka. Here’s one of the weird quirks about this project: A lot of the soldered leads are under other modules. The Select button is one of them, and in the process of removing the sound module to more closely inspect the Select button, I completely destroyed the module (don’t worry, everything else was fine, and I have more sound modules).
Shortly after that, I found the web flasher for KeiraOS, which obviated my worry over the Select button. Don’t waste your time with boot mode or the VSCode build unless you’re a glutton for punishment and you know what you’re doing. And even with the additional affordances of a web flasher, getting the Lilka into the right state involved some odd timing of pressing and releasing the Select button.
Your Lilka works! Now what?
Now that your Lilka has an OS/firmware, what should you do with it? I don’t know, maybe play some Doom? There are a surprising number of apps available for the Lilka. While the console looks like a video game controller, it’s not just for playing video games (although there are emulators available). You can add an app to turn it into a BLE controller, add a video player, or use it as a Meshtastic node. I’m going to play some video games, but you could do all of that other stuff, too.